Wednesday, September 19, 2012

Make your own sticky grams!

After seeing the adorable Rockstar Diaries's fridge covered on "sticky grams" I decided to see if I could make my own version of them instead of paying $14.99 per sheet of 9 (ouch)


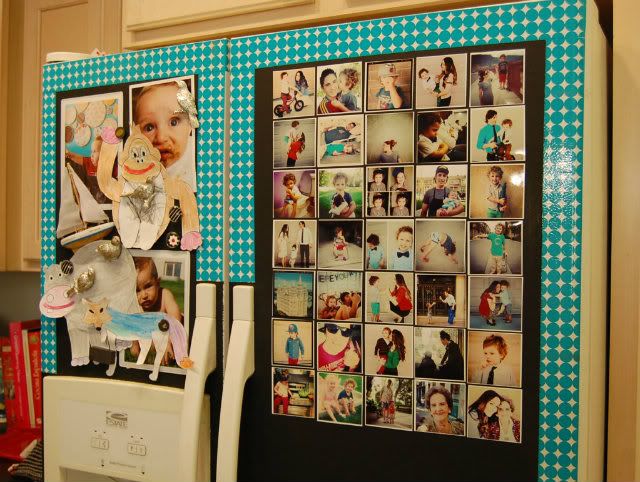
...so here is my version...."kind -of- the-same" and for $11.00 total!
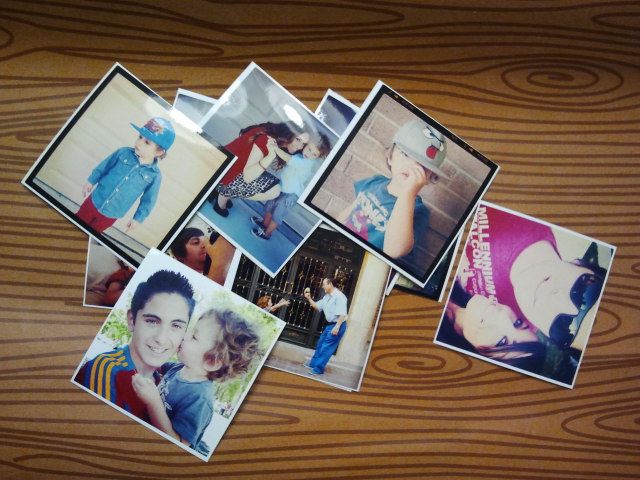
First I sent to my e-mail of the Instagrams that I liked the most, and downloaded them on my computer. Then I created several collages using this free and super simple web page and sent them to Costco to print as 8x8's.Total cost of the prints: around $6

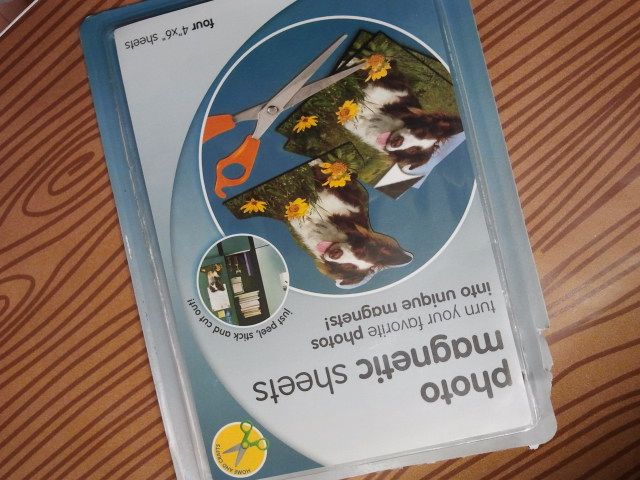
Then I cut the pictures with a paper cutter. I bought at Office Depot these magnetic sheets for about $5 and cut them into little pieces to stick behind each of the pictures


....like this...


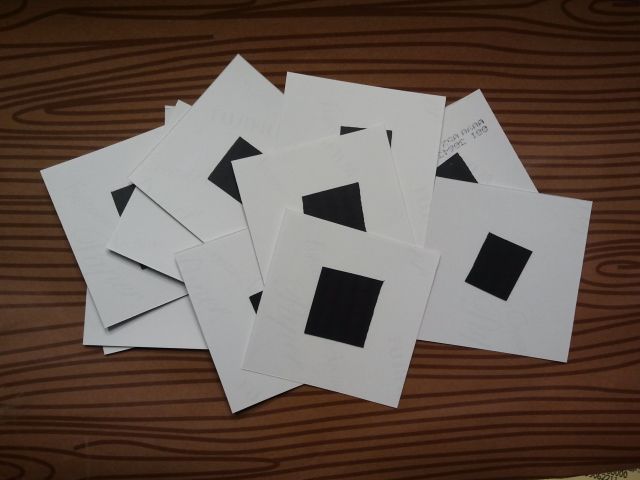
and voila!....very easy!
 

Monday, September 10, 2012

A little project...

A while ago a saw this fun tutorial from the cute A Beautiful Mess Blog, and decided to give it a try!. All you need is an ugly painting from D.I. or your grandma :), vinyl letter stickers (I got mine at Home Deport) and spray paint.  
...First you stick your letters in the painting....
...then you spray paint the whole thing. Let it dry and then peel off the letters!.... 
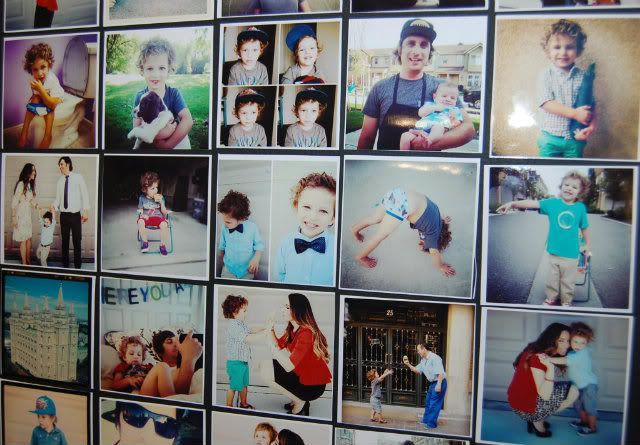
....Mine needs a few touch ups, but it's almost done!....Love it!

Monday, December 12, 2011

Christmas treats

..Last year I made these yummy licorices for our neighbors as little Christmas treats..This year I am making a bunch of different cookies, that I found in Pinterest !
These are Candy Cane Blossoms...they were pretty easy to make.

...and then I decided to give these Tree cookies a try....and I won't go into detail, but they looked cuter unbaked....

...finally I just used these bags that I bought at Ikea long time and ago, with these tags that you can print, and voila!....
...I still have to make a few more treats....so more ideas to come!

Saturday, December 3, 2011

Reindeer cookies

After seeing a gazillion pictures here of these cookies, I decided to give them a try...

...they are cute, easy and perfect for the season!...
...I didn't feel like making them from scratch, so I bought a mix of ginger cookies, baked and decorated them...I'm so excited for Christmas!

Friday, December 2, 2011

The Festival of Trees...

...is one of my favorite things to do during Christmas...this year I only went  for work, so I couldn't see and enjoyed it like other years...oh well...
...Diego would have loved the "UP" tree...

Thursday, October 20, 2011

Foam

Inspired by this very talented girl....I decided to make some foam figures for Diego to play in the tub...he loved them, and it was very hard to get him out of it....he loved putting the wheels in the car, making the flowers, playing with the clouds...I will definitely make many many more!


Sunday, October 2, 2011

Crayola art, while Diego took a nap.

After seeing this idea in Pinterest ,

I decided to give it a try and create some art for Diego's room....and voila!
******
Vi esta idea en Pinterest, de como crear un cuadro bastante original con ceras, y decidi  intentar hacer mi propia version, y voila! (abajo estan las instrucciones paso por paso, es muy facil!...solo hay que pegar las ceras una a una en la parte superior de un lienzo blanco, y luego con un secador de mano se van derritiendo, y al caer la cera va creando interesantes dibujos!...muy facil y perfecto para el cuarto de Diego!)
...kind of happy with the final result...I wish I would have added more bright colors, and eliminated the browns and black, but oh well...overall I like it and Diego loooves it!...he screams "pinta" (to draw) everytime he sees it...
...so this is what you start with...a white canvas and a  box of crayolas....(I bought the 64 units one, but if you want to make it brighter, you'll have to buy a smaller extra box)

...then you figure out what your color scheme is going to be like...
..and then you get busy with a glue gun!...
...almost half way through...
...all glued!...
...and then this if the fun part: get your hair dryer and start melting!
(I almost didn't want to do the last step...it looked so pretty already....)
...and after about 20 minutes of melting by sections this is it!....NOTE: make sure you cover not only the floor but also the walls for this last part....there are splashes of color all over my living room wall....yikes!
It was overall a fast craft, about an hour an a half total time!...thanks Pinterest:)

Tuesday, September 27, 2011

Autum wreath


...finally I decided to make a fall wreath...and after seeing a gazillion of them in my newest obsession (pinterest) I got busy this past weekend.
Total cost: about $5. I already had the wreath. I just bought some brown burlap and after cutting some stripes, started to wrap the wreath...

...that was the most boring part, plus the glue gun and I have a "love-hate" relationship, so I got a few burns...
...and after that, the fun part! I used stuff that I bought at the dollar store to decorate it...
something tells me that this will not be the last one I make!

Sunday, September 25, 2011

"better than nothing...."

...those were literally the words that came out of Mike's mouth when I asked him if he liked the new doily banner that I made for our bedroom...
so encouraging, huh?...hehe..I still love him...the best part is that it was only $1!....I bought the paper doilies at the dollar store and I used some cute twine that I had from Diego's b-day decorations from last year. I only folded them, stapled the bottom of each doily so they wouldn't open, and voila! done!
....I think is cute...
...oh ans I also spray painted a ceiling fan that Mike's parents donated to us!...it was brown (a pretty ugly brown) and now is cute and white to match the bedroom!...I'm in love with spray paint!..

Friday, July 8, 2011

Did you know....

that there is a house here in Utah (Herriman) being built as a replica of the cartoon one in "Up"?....Seriousy, if I had $400.000 I would live there...forever...

(Paul Fraughton | The Salt Lake Tribune)

...more info, here.

Wednesday, July 6, 2011

Balsamic & Parmesan Roasted Cauliflower

...I'm trying to eat healthier, so I saw this recipe here, and decided to give it a try...
...and I don't know where my baking sheet it, so I cooked it in my beautiful star mold...
...the result?...nah...good but not as I expected it. Here is the recipe anyways:

Ingredients

  • 8 cups 1-inch-thick slices cauliflower florets, (about 1 large head; see Tip)
  • 2 tablespoons extra-virgin olive oil
  • 1 teaspoon dried marjoram
  • 1/4 teaspoon salt
  • Freshly ground pepper to taste
  • 2 tablespoons balsamic vinegar
  • 1/2 cup finely shredded Parmesan cheese
 Preparation
  1. Preheat oven to 450°F.
  2. Toss cauliflower, oil, marjoram, salt and pepper in a large bowl. Spread on a large rimmed baking sheet and roast until starting to soften and brown on the bottom, 15 to 20 minutes. Toss the cauliflower with vinegar and sprinkle with cheese. Return to the oven and roast until the cheese is melted and any moisture has evaporated, 5 to 10 minutes more.